Do you get that warm fuzzy feeling from receiving a handmade DIY birthday card? Let’s face it, there’s something truly special about a physical token that shows you care. If you (or someone you know) also enjoys the magic of scrapbooking, then card making might be your next creative obsession!
This post is for anyone who wants to ditch the digital birthday greetings and bring back the joy of a tangible smile. So, grab your scissors and glue, because we’re about to craft a super cute DIY Birthday Card that’ll knock their socks off!
Personal Touches Are Always a Win!
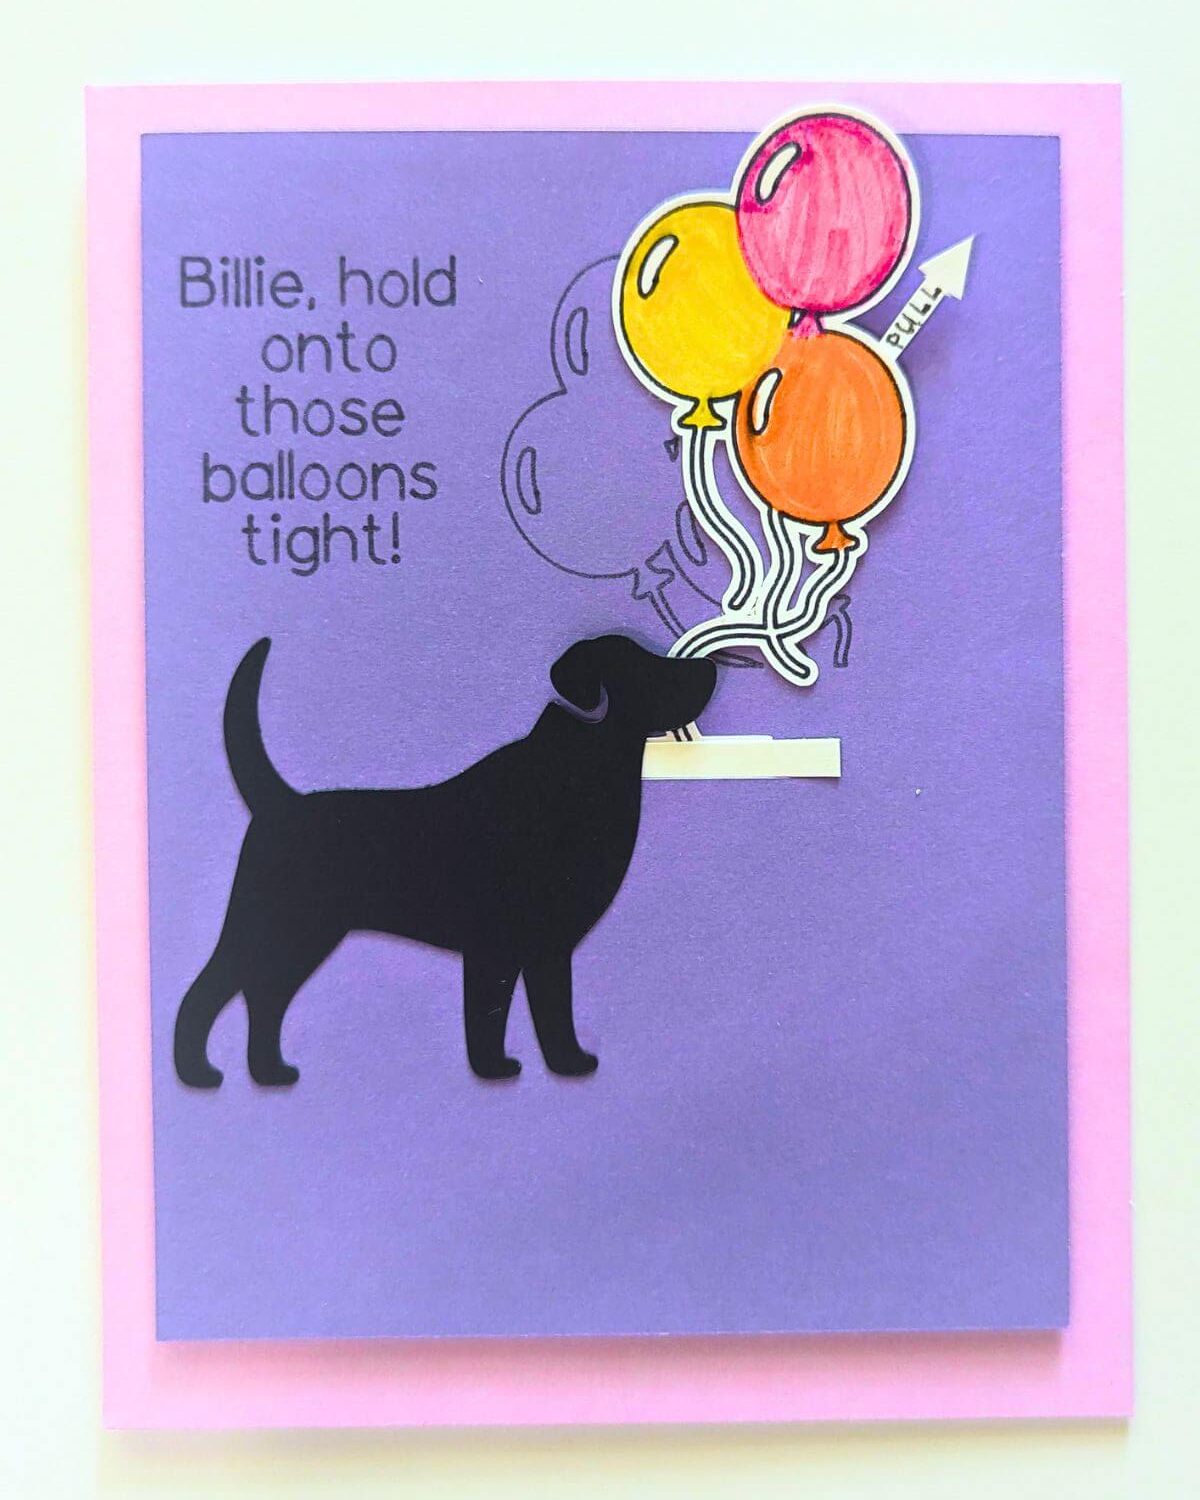
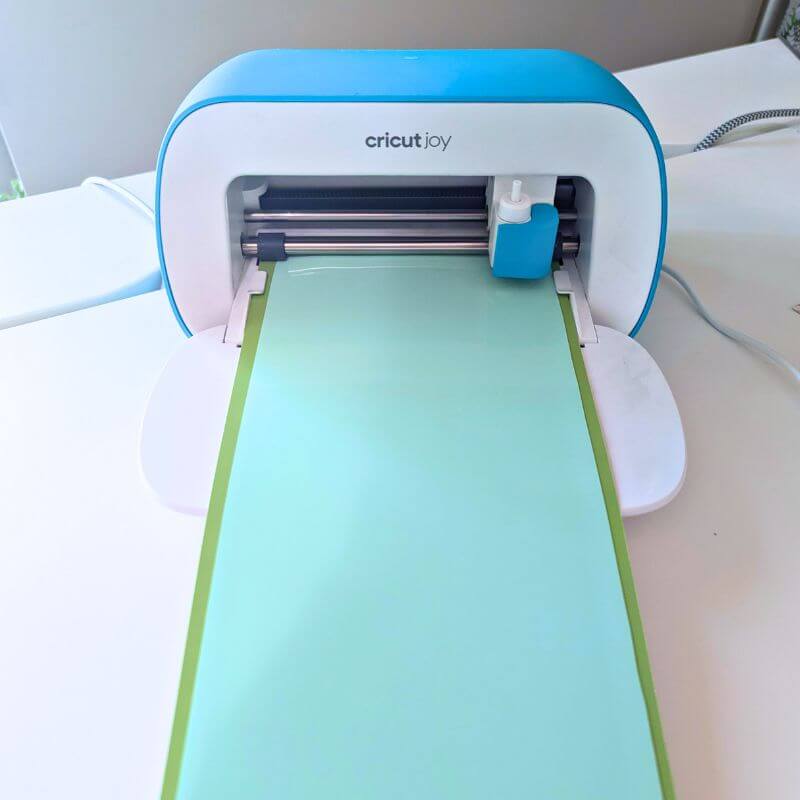
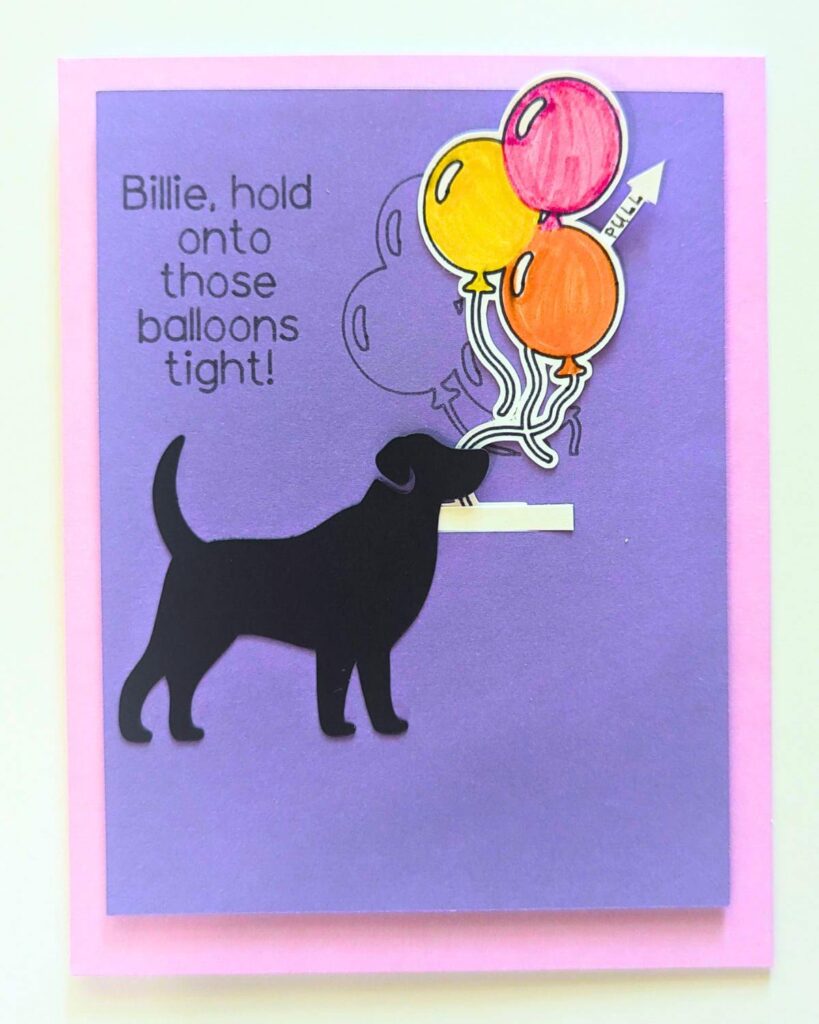
The best part of handmade cards? Adding personal touches! You can’t buy that at a store. Take my friend’s card for example. Her dog, Billie (a classic black pup!), is the star of the show. Finding a Cricut cutout that looked just like Billie was a breeze, and my Cricut Joy made quick work of the balloons and birthday message.
Speaking of Cricut Joy, if you love papercrafting – scrapbooking or card making – this machine is your new best friend! It even has special cutting mats sized perfectly for cards, so you can simply stick your cardstock in and get crafting.
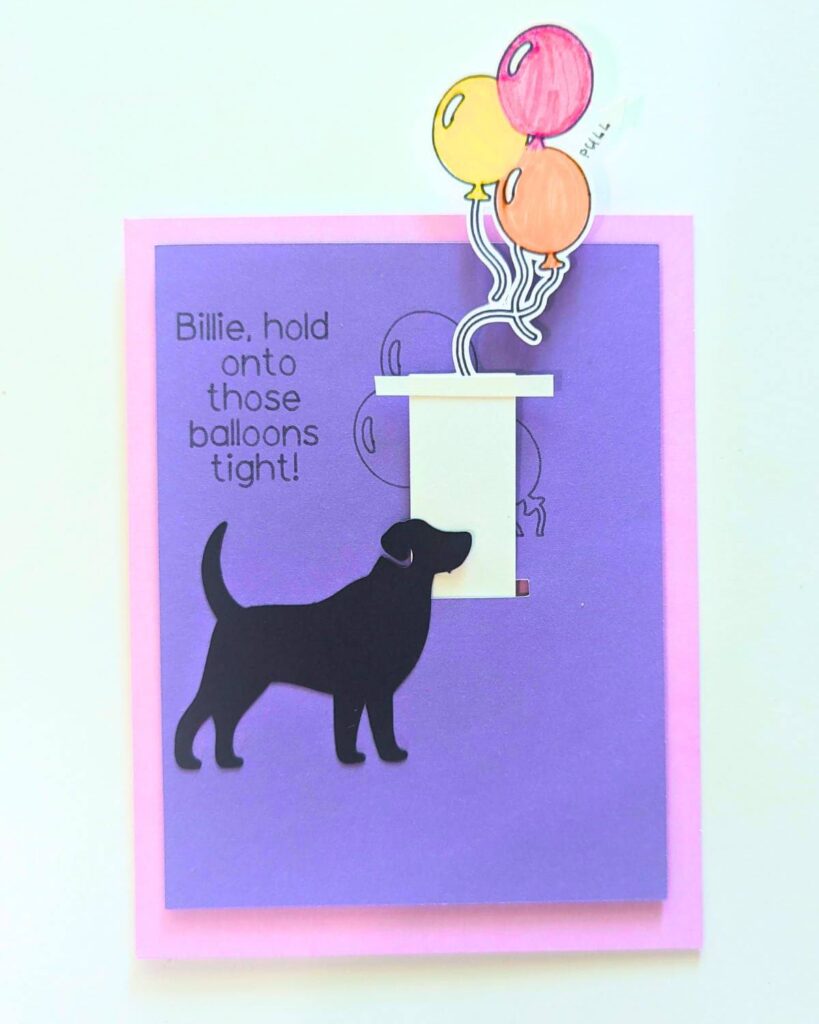
Let’s Get Interactive: Creating Pull-Up Balloons!
Now for the fun part – the interactive pull-up balloons! To achieve this playful effect, we’ll need a few extra steps.
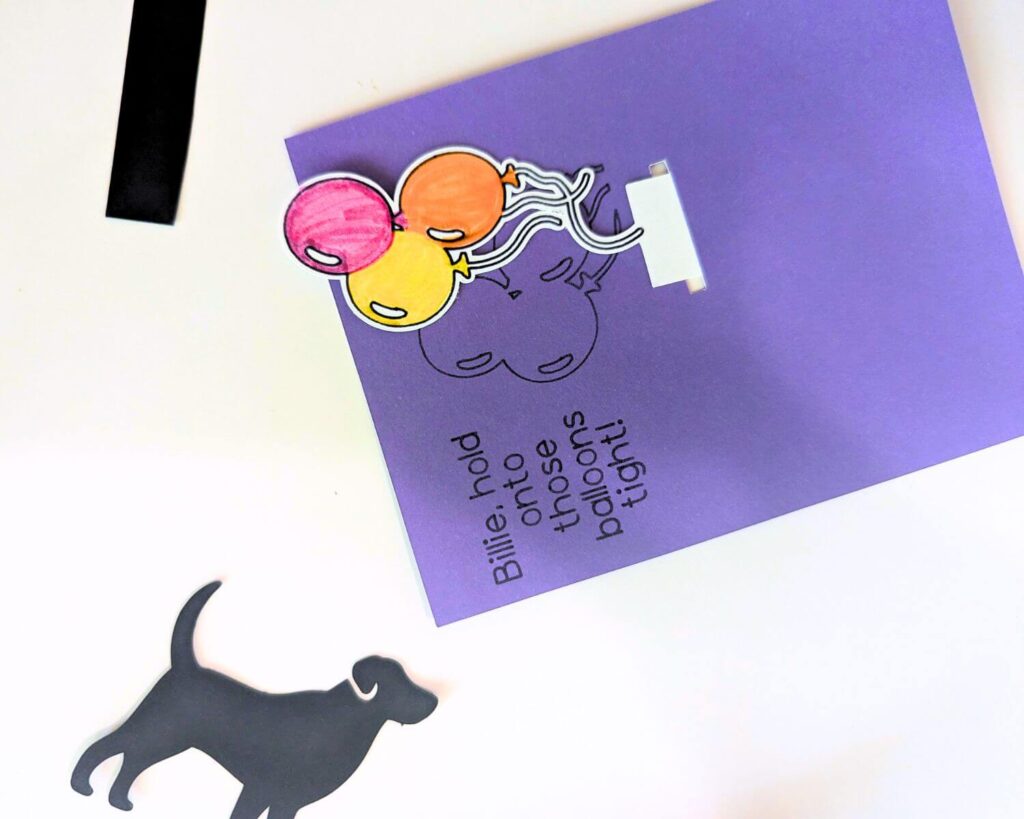
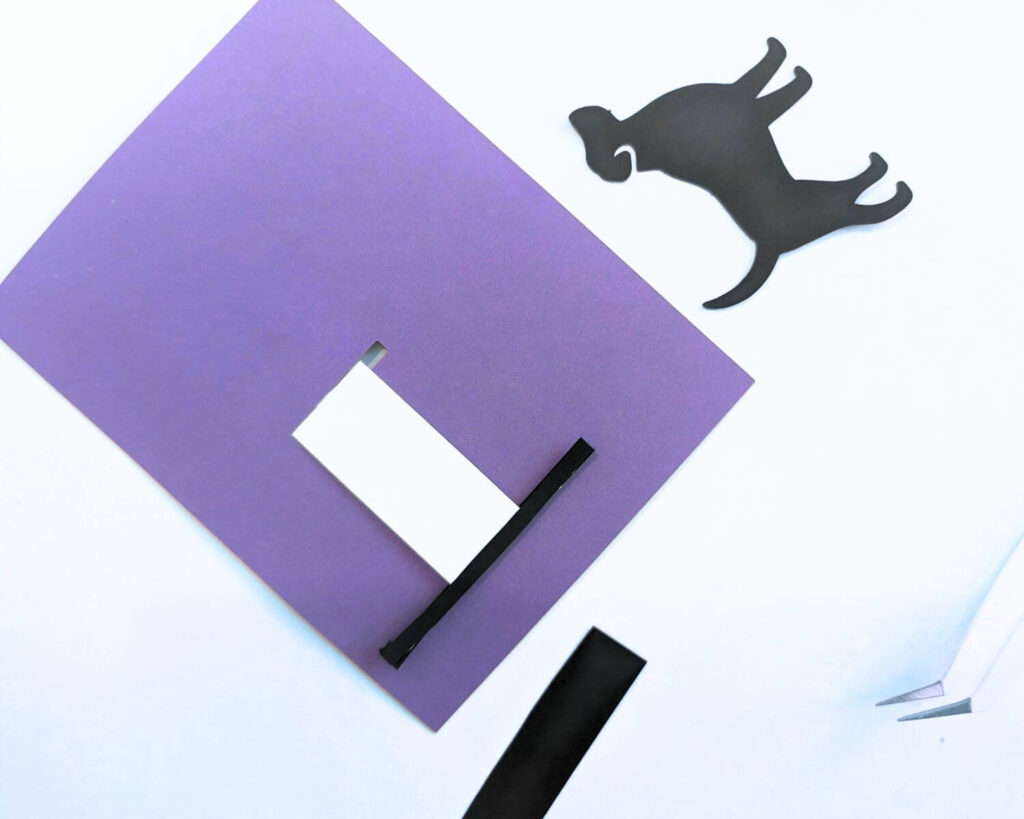
- Prep the Interactive Panel: First, grab a scrap piece of paper slightly smaller than your folded card. Use your Cricut Joy to cut a small slit in this paper – this is the secret passage for the balloons! You can also have the Cricut draw additional balloon designs and text on this same piece of paper for a more decorative touch.
- Craft the Balloons: Here’s where you can personalize! Use your Cricut Joy to draw and cut out balloons on separate white paper. This allows you to color them in with your favorite acid-free markers for a vibrant touch.
- Sneak in the Balloons: Slide the cut-out balloons through the slit on your interactive paper panel.
- Create a Stopper: To prevent the balloons from disappearing completely, glue a larger scrap paper on both sides of the slit, acting as a stopper that keeps the balloons within range.
- Add Dimension with Foam Adhesive: Now comes the magic! Glue the entire interactive paper panel (with the balloons peeking through) onto your folded card using foam adhesive. This foam adhesive creates a slight lift, providing enough space for the balloons to slide up and down smoothly.
- The Grand Finale: Add your adorable dog image (like Billie!), making it look like she’s holding onto the balloons as they playfully slide down. Don’t forget to personalize the inside of the card with a heartfelt birthday message!
With these steps, you’ve created a one-of-a-kind interactive card that will bring a smile (and maybe a giggle) to the birthday recipient’s face!
This blog post may contain affiliate links. This means that if you click on a link and make a purchase, I may receive a commission at no additional cost to you. However, all of the products I recommend are ones that I have personally used and loved.

